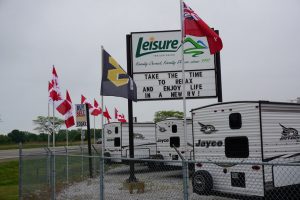


Hello all, and welcome to Leisure Trailer Sales, a full-service Trailer and RV dealership based in beautiful Tecumseh, Ontario. Like most RV fans at this time of year, we’re getting excited to start preparing for a busy camping season ahead. Spring is officially here, and if you followed our ‘how to winterize an RV’ blog post, and had your RV winterized and stored for the colder months, now’s the perfect time to start thinking about undoing all of that hard work you put into it in the fall! Other than the obvious, which is simply reversing the steps you took to winterize, there are a few other critical factors to consider before you get up and go; so, with that being said, we’ve prepared another handy list to help you de-winterize your RV, and get from winter storage to the open road.
Exterior
1. First things first, wash your RV. During storage, it’s quite likely that all kinds of dirt and dust have accumulated on your trailer’s exterior. Any standard RV shampoo and wax should work perfectly. 2. Unfurl any awnings, and extend your slide outs to wash those thoroughly too. 3. Once your RV is clean, this should make it a lot easier to conduct a proper visual inspection. At this point, you’re going to be looking for any cracks, caulk damage, or missing sealant. Check the interior, too – if you’ve got any leaks, there might be water appearing on the inside of your trailer; better to find it now and fix it, then to discover this when you’re at your destination and it’s too late! 4. If you find that your caulk or sealant is dry, cracked or missing, remove the old and replace with new. Ensure you’re working on a clean, dry spot, and reapply accordingly.
Electrical / Batteries
5. Turn on your lights and signals, then conduct a walk around the unit to ensure all lamps are working correctly. Replace as necessary. 6. If you haven’t kept your RV hooked up to a battery tender supplying a trickle charge, you’ll find that it could be flat – this is a common problem, as RV batteries can discharge at a rate of up to ten percent per month when stored. To get your batteries ready to use once again, turn off all RV power, put the cutoff switch to off, and ensure any external power connection is disconnected. Whenever you’re working on the battery, be sure to wear protective equipment as there is corrosive acid inside. 7. Clean the battery itself, and clean the terminals if you find them to be oxidized. If during your inspection you find that there is any damage, such as cracks, in the battery housing, replace without question as this cannot be repaired. If you’re replacing one battery, it’s a good idea to replace them altogether. 8. Now it’s time to charge the battery, once charged, check the battery fluid for correct level. If it’s low, top up with distilled water. 9. Reconnect the batteries, taking care to ensure that the terminals are hooked up correctly.
Tires
10. Check your tire pressure. When the temperature drops, so does the pressure in your tires, not only that, but air can actually seep through the tire walls when in stationary storage. Some manufacturers fill their RV tires with nitrogen, which better resists changes in pressure with temperature change compared with plain compressed air. If you have nitrogen in your tires, and you find that your pressure has dropped below the manufacturer’s recommendation, you can safely top up with regular air, this will allow you to get to a dealer that has compressed nitrogen to refill with. If you’re OK just topping up with air, do so until you hit the recommended PSI for your RV. Don’t overlook this step, as this could lead to big challenges and potential blowouts on the road. 11. Next, it’s time to clean out the interior. You may have kept on top of this throughout the storage period if your RV was stored in your drive way, but if you’ve winterized your RV and left it at a camp site, or haven’t given it a second thought through the winter, you’re likely to find it dusty, and perhaps a little damp smelling. Open the doors and windows and turn on some box fans (and ceiling fans if fitted) to get some air moving through. Get to every nook and cranny, including in and behind drawers, as well as the refrigerator.
Interior
12. Keep a particular eye out for evidence of pest problems; rodents like mice seek dry places to hole up during the winter, and an undisturbed RV makes the perfect location. Not only is sharing your RV with rats or mice not everyone’s idea of a good time, these creatures can harbor some dangerous diseases. If you find evidence of these critters (like feces), ensure you wear a dust mask when you’re cleaning, as the viruses transmitted by their waste can become airborne. Clean thoroughly with bleach on all hard surfaces and clean soft furnishings with fabric sanitizer.
Fresh Water System
13. Set up your potable water system. This is largely a case of reversing the steps you took to winterize your RV, but just to be sure, make sure you do the following: a. Check the system for leaks – if there are any, you’ll find evidence of antifreeze on surfaces or below the RV. b. Turn the water heater bypass valve to normal, turn on both hot and cold water, and check all taps or faucets for evidence of leaks. c. Drain the non-toxic antifreeze you primed the system. d. Flush the system with a solution of a quarter cup of bleach to every one gallon of water for every 15 gallons of tank capacity – put this solution in the fresh water tank and run the pump. e. Slowly open each faucet or tap until water flows. Close the tap or faucet and move on to the next until you are confident the bleach/water solution has reached all areas. f. Leave the solution sitting in the system for at least 4 hours to disinfect the pipes. g. Begin pumping fresh water through the system (bleach free) until there is no longer smell or taste of bleach.
Propane System
14. Turn on your RVs gas leak detector and check your LPG system by performing a visual inspection. You’re checking that the seals and hoses are in good condition, replace any dried or cracked lines and seals. It goes without saying that during this portion of the de-winterizing you should ensure that there is no smoking in or near the RV and that no open lights or sparks are present. 15. If you’re happy that the gas lines are in good condition, slowly open the valve and restore gas to the system. Smell for any leaks – if you detect gas, either with your nose or by way of the gas detector, turn off the valves, air out the RV and seek immediate professional assistance. 16. If gas returns to the system with no leaks detected, ensure that all gas-powered utilities are functioning correctly including all stoves, cooktops, and the refrigerator if it has a gas-powered mode.
Appliances
17. Check the function of the rest of your appliances, including water heaters, washers, dryers, televisions, stereos, and associated speakers.
Dump Hoses and Waste Tanks
18. Check your sewage system – start with the dump hoses, here, you’re looking for cracks and leaks. 19. Next, check the gaskets and seals on the waste tank and the valves. This shouldn’t be too much trouble as you made sure that the waste tank was empty (other than a couple of cups worth of antifreeze) in the winterizing process. If the lube you applied to the valves in the winter has dried out, simply apply some more – as before, WD40 works great. 20. Start packing your bags, you should be ready to hit the road! Leisure Trailer Sales are an Ontario RV dealer that truly care. If you’re having difficulty de-winterizing RV, or you would simply rather have someone else take care of it, feel free to give us a call, our technicians are highly trained experts that can definitely assist you in getting your trailer or RV ready for the summer of adventures you have planned!