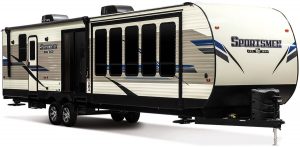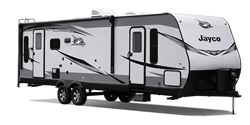
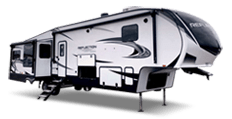
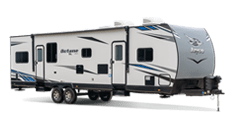
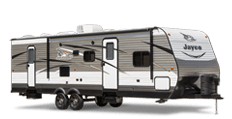
Thanks for coming along (virtually!) to Leisure Trailer Sales, we are a full-service Ontario RV dealer taking care of sales, maintenance, financing, spares, and upgrades – if it’s for your RV, we’ve got it! Based in beautiful Tecumseh Ontario Canada, we know a thing or two about harsh winters, and making sure that your RV is ready for whatever Mother Nature throws it’s way. We’ve been in the business for 62 years now, so we have decided to put that experience to good use and provide you with a list of the steps you should be taking to properly winterize your RV.
If you’re unlikely to use your RV trailer through the winter months, we cannot overemphasize how important it is to ensure that you prepare your RV or trailer accordingly. The steps are basic, yet the consequences of not following them can be disastrous, and likely lead to huge repair bills, and delayed use of your RV when the spring and summer months come around again. Worst case, you could potentially total your pride and joy! To avoid these pitfalls, make sure you properly winterize! The handy guide below, combined with the careful following of your RV’s manufacturer’s instructions, and advice from the professionals here at Leisure Trailer Sales will help to keep your RV running in peak condition for years to come.
First things first – your shopping list. There are some absolute essentials you’re going to need, and these can be found at any good RV dealer, auto store or aftermarket parts supplier. You’re going to need;
- A good, non-toxic RV specific antifreeze. This will be needed for potable water tanks and lines, so non-toxic is essential to ensure safety;
- A wand or flexible brush. You’re going to need this to clean out holding tanks;
- A set of basic hand tools. These will be necessary for removing drain plugs during the process;
- A water heater bypass kit. Some RVs have these pre-installed, but if you don’t, you’ll need one;
- A water pump converter kit, or some appropriate tubing for connection to the inlet of your water pump.
Once you’ve assembled your winterizing gear, it’s time to begin! As mentioned in the intro, it’s very important that you follow your RV manufacturer’s specific instructions, this is a generic guide of the steps to take, but the way you go about it will change from RV to RV. As you go through, it’s helpful to take note of all of the steps you take, this will come in handy when it comes time to get it ready for use again, and also helps to make sure you covered all steps in the list.
1. Remove all in line water filtration units and then bypass – This ensures you don’t contaminate filters with antifreeze.
2. Remove plugs and drain out your potable water holding tank.
3. Remove plugs and drain out your grey and black water holding tanks. Once drained, it’s very important that you flush these out too, otherwise, you risk residue sticking to the tank or being stuck in a line and freezing – it also helps to keep things fresh. Not all RVs are fitted with a tank flushing system if yours isn’t then you’re going to have to use your wand or flexible brush to clean out the black water tank; if this is the case, ensure you wear protective equipment as this isn’t the most pleasant job! After the tanks are cleaned and flushed, make sure to lubricate the termination valves, WD40 or similar will work for this job.
4. Ensure the water heater is off, and that there is no pressure on the line by opening the pressure relief valve. Once this is confirmed, remove the plug and drain the unit.
5. Go through the RV and open every hot and cold tap or faucet. This also includes the toilet valve. If you have an outdoor shower or hose (most common on toy haulers), make sure that they’re open too.
6. Your RV will have low point drain lines, gravity will help to drain them, but due to bends and curves in the pipes, you’ll need some assistance from the water pump. Open the valves on the hot and cold drain lines and start the pump. Extremely important: When water stops flowing out, or it begins to become aerated, stop the pump immediately, running a pump dry can cause it to burn out very quickly.
7. Go back around and close all the taps, faucets and valves you opened.
8. Open your water heater bypass kit and equip it. It’s important to take this step before starting with the antifreeze otherwise you’ll simply fill up the water heater with it.
9. Rig your water pump converter kit, or use the tubing you bought (if that’s what you did). If you went down the tubing route, disconnect the inlet side of the pump, and attach the new tubing at that end – you’re then going to lead the tubing into the antifreeze you bought.
10. Now it’s time to pump your non-toxic RV antifreeze through your pipework. Start by turning on the water pump. You’re going to have to work your way through the RV now, starting with the closest tap or faucet – slowly open each and everyone until antifreeze flows through. Once antifreeze comes through the tap or faucet, close it and move on to the next, until you’ve covered them all. Just as when you drained your water lines, make sure that there’s a constant supply of antifreeze to the pump, if it runs dry you can potentially burn it out, causing significant damage.
11. Don’t forget the toilet! Flush repeatedly until antifreeze flows through.
12. It’s time to turn off the water pump now. Once the pump is off, relieve the pressure on the line by opening a tap or faucet.
13. The next step is to take antifreeze through to the municipal water inlet. This is located outside – you’ll need a small screwdriver for this part. Remove the protective screen on the inlet, and use the screwdriver to apply gentle pressure to the valve. Once antifreeze is flowing stop, and don’t forget to put back the protective screen.
14. Take some antifreeze and pour down all drains in the interior (showers, bathtubs, sinks, even the toilet bowl), around 3 cups for each should suffice. Flush the toilet once more.
15. Go back around the RV and make sure all taps or faucets are closed – this will ensure antifreeze doesn’t leak out of the system while it’s unattended.
16. If fitted, you’re going to want to make sure that power is disconnected from the electric heating element of your water heater.
17. Step back and relax! Your RV should be ready for a winter rest, and you can sleep soundly knowing it will be in great condition when it comes time to de-winterize.
If you’re uncomfortable taking care of this on your own, you’re not alone, but Leisure Trailer Sales are here to help. Our expert technicians would be happy to help you with your RV winterization needs. Feel free to stop by and find out more. Our well-stocked parts section will have everything you need if you choose to take this on yourself, too.